Editing Mode를 테스트하다가 따로 구현하지 않았는데도 editingStyle이 delete로 지정된 Cell들은
오른쪽에서 Delete 버튼이 튀어나오는걸 알게되어서 Swipe Actions에 대해 알아보았다.

1. UIContextualAction, UISwipeActionsConfiguration
UITableView의 Delegate를 상속하는 ViewController에서 swipe라고 입력하면 leading과 trailing으로 시작하는 메소드가 있다.

말 그대로 leading은 왼쪽 끝에서 보이게 될 SwipeAction이고 trailing은 오른쪽 끝에서 보이게 될 SwipeAction이다.
이 두가지를 구현해주면 된다.
SwipeAction를 구현하기 위해 UIContextualAction과 UISwipeActionsConfiguration를 만들어줘야하는데
이에 대해 애플 문서에는 이렇게 나와있다.

테이블 로우를 swipe했을 때 보여지는 액션이라고 설명하고 있고
사용할 때는 UITableView Delegate에 UISwipeActionsConfiguration를 초기화하라고 되어있다.
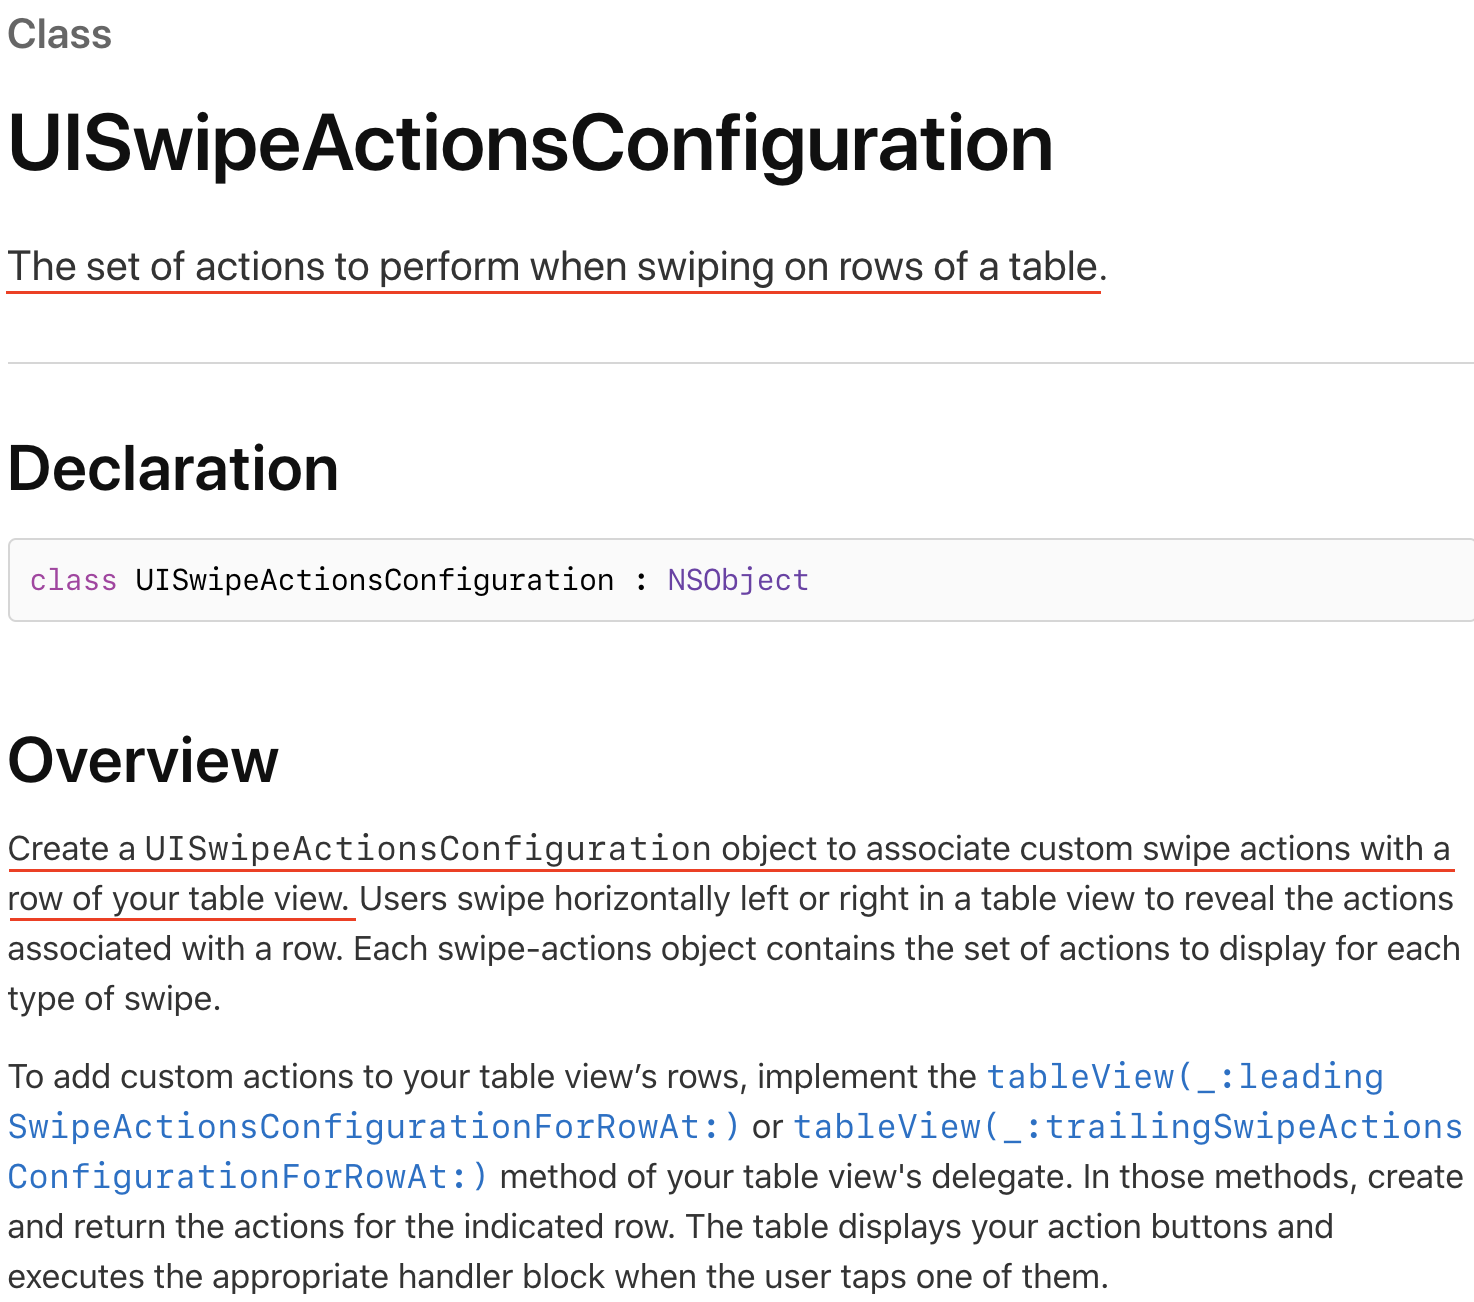
UISwipeActionsConfiguration는 TableView의 row를 Swipe했을 때 작동할 Action들의 Set이며
TableView row의 Custom Swipe Actions을 모아둔 객체라고 되어있다.
메소드 구현에 필요한 재료들을 알아봤으니 구현해보자.
2. Swipe Action 구현
Swipe Action 구현하려면 위에서 봤듯이
UIContextualAction를 만들어서 UISwipeActionsConfiguration에 담아 return해야한다.

구현하기 전에 UIContextualAction를 어떻게 만들지 파라미터들에 대해 알아보자.
애플 문서를 보면
UIContextualAction.style은 enum 타입으로 normal과 destructive가 있고
UIContextualAction.Handler는 action, sourceView, completionHandler를 파라미터로 갖는 handler라고 나와있다.
이제 구현해보자.
|
1
2
3
4
5
6
7
|
func tableView(_ tableView: UITableView, leadingSwipeActionsConfigurationForRowAt indexPath: IndexPath) -> UISwipeActionsConfiguration? {
let actions1 = UIContextualAction(style: .normal, title: "1", handler: { action, view, completionHaldler in
print("action performed")
completionHaldler(true)
})
return UISwipeActionsConfiguration(actions: [actions1])
}
|
cs |
UIcontextualAction 변수를 생성하여 UISwipeActionConfiguration의 actions에 Set형태로 넣었다.
trailiingSwipeActionConfigurationForRowAt의 구현방법은 leading과 똑같지만
UISwipeActionConfiguration의 actions에 UIcontextualAction를 담는 순서에 따라 보여지는게 반대이다.
|
1
2
3
4
5
6
7
8
9
10
11
12
13
14
15
16
17
18
19
20
21
22
23
|
func tableView(_ tableView: UITableView, leadingSwipeActionsConfigurationForRowAt indexPath: IndexPath) -> UISwipeActionsConfiguration? {
let actions1 = UIContextualAction(style: .normal, title: "1", handler: { action, view, completionHaldler in
print("action1 performed")
completionHaldler(true)
})
let actions2 = UIContextualAction(style: .normal, title: "2", handler: { action, view, completionHaldler in
print("action2 performed")
completionHaldler(true)
})
return UISwipeActionsConfiguration(actions: [actions1, actions2])
}
func tableView(_ tableView: UITableView, trailingSwipeActionsConfigurationForRowAt indexPath: IndexPath) -> UISwipeActionsConfiguration? {
let actions1 = UIContextualAction(style: .normal, title: "1", handler: { action, view, completionHaldler in
print("action1 performed")
completionHaldler(true)
})
let actions2 = UIContextualAction(style: .normal, title: "2", handler: { action, view, completionHaldler in
print("action2 performed")
completionHaldler(true)
})
return UISwipeActionsConfiguration(actions: [actions1, actions2])
}
|
cs |
두 메소드를 동일하게 구현하고 실행해보자.
같은 순서로 action들을 담았음에도 불구하고 반대 방향으로 배치되어있다.
leading메소드는 UISwipeActionsConfiguration에서 action을 꺼내서 leading쪽부터
trailing메소드는 UISwipeActionsConfiguration에서 action을 꺼내서 trailing쪽부터
서로 반대방향으로 밀어넣는다고 생각하면 편할 것 같다.
3. View 꾸미기
SwipeAction의 버튼에 이미지나 색상을 입히는 방법이다.
|
1
2
3
4
5
6
7
8
9
10
11
12
13
14
15
|
func tableView(_ tableView: UITableView, leadingSwipeActionsConfigurationForRowAt indexPath: IndexPath) -> UISwipeActionsConfiguration? {
let actions1 = UIContextualAction(style: .normal, title: "1", handler: { action, view, completionHaldler in
print("action1 performed")
completionHaldler(true)
})
actions1.backgroundColor = .systemOrange
actions1.image = UIImage(named: "comment.png")
let actions2 = UIContextualAction(style: .normal, title: "2", handler: { action, view, completionHaldler in
print("action2 performed")
completionHaldler(true)
})
actions2.backgroundColor = .systemYellow
actions2.image = UIImage(named: "share.png")
return UISwipeActionsConfiguration(actions: [actions1, actions2])
}
|
cs |
UIContextualAction 변수를 생성하고 나서 적용하면 된다.
각 View에 배경색을 입힌 후에 이미지를 올렸다.
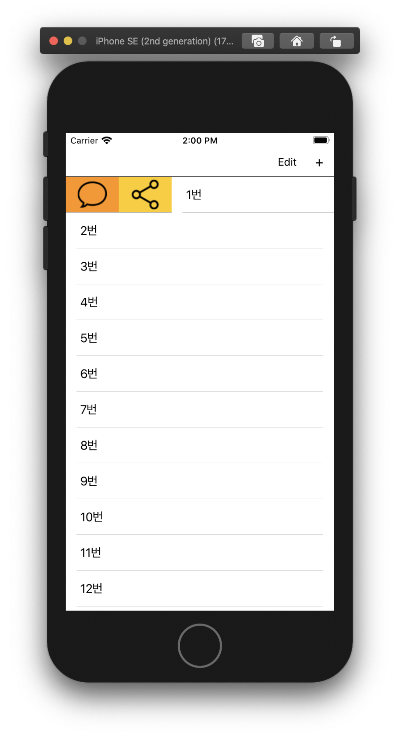
주의할 점은 Swipe Action View영역에 맞는 크기의 이미지여야 한다.
나는 heightForRowAt에서 row의 높이를 50으로 지정하고 51X51 사이즈의 이미지로 적용했다.
3. 의문
UIContextualAction.Handler 여기에 아래와 같은 내용이 있다.
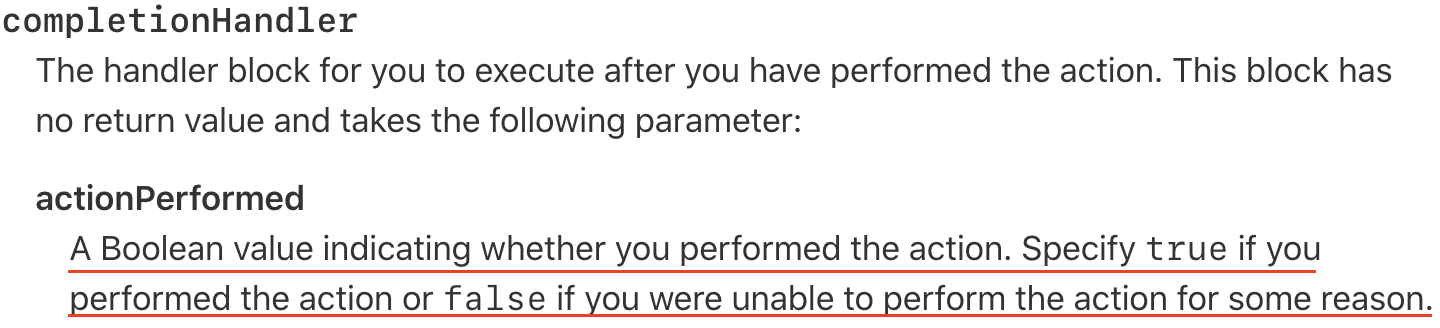
UIContextual.Handler에서 completionHandler()를 false로 지정할 경우 어떤 이유로 action을 실행하지 못 할 수 있다고 돼 있는데
completionHandler(false)로 지정해도 정상적으로 action이 작동했다.
그래서 true와 false의 차이를 여기저기 찾아본 결과 뚜렷한 답은 없었고
iOS 11 이전에는 false로 지정할 경우 작동하지 않았는데 버그로 간주되어 작동되도록 수정됐다고 한다.
(https://developer.apple.com/forums/thread/129420)
끝
참고
https://programmingwithswift.com/uitableviewcell-swipe-actions-with-swift/
'이상 > iOS' 카테고리의 다른 글
| [iOS] UITableViewCell Swipe Delete (0) | 2021.02.02 |
|---|---|
| [iOS] UIRefreshControl의 발견 (0) | 2020.07.15 |
| [iOS] UITableView Editing Mode (0) | 2020.07.13 |
| [iOS] 엔터프라이즈 배포 (0) | 2020.07.06 |
| [iOS] CheckBox 만들기 with Delegate (0) | 2020.07.06 |


