Android와 달리 iOS에는 CheckBox나 RadioButton과 같은 기능이 없다.
앱을 만들다 보면 로그인 화면의 자동 로그인, 목록에서 항목 선택 등
CheckBox 컨트롤이 필요한 경우가 의외로 많다.
이번 내용은 CheckBox를 만드는 방법과 알아두면 아주 유용하게 사용될 Delegate에 대한 것이다.
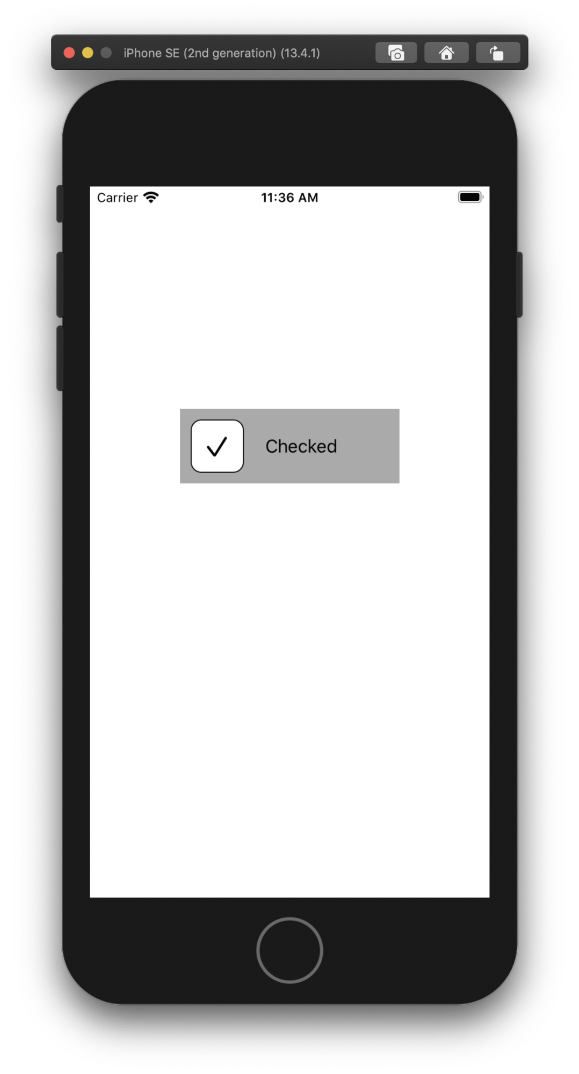
결과물부터 보자.
CheckBox도 CustomView를 이용하여 만들었다.
1. 파일 생성
CheckBox를 만들고 Delegate를 이용하여 상태값을 변경할 것이므로 Delegate.swift가 추가되었다.
2. 화면 만들기 (CheckBoxView.xib)

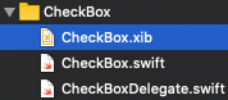
정사각형 모양의 CheckBox를 만들 것이므로
View의 Size를 FreeForm으로 설정하고 Width와 Height의 비율을 1:1로 설정한다.
여기에 UIView를 추가하고 그 안에 Text가 ✓인 UILabel을 추가하고 Constraints를 지정한다.
(참고로 특수문자 단축키는 control + command + spacebar)
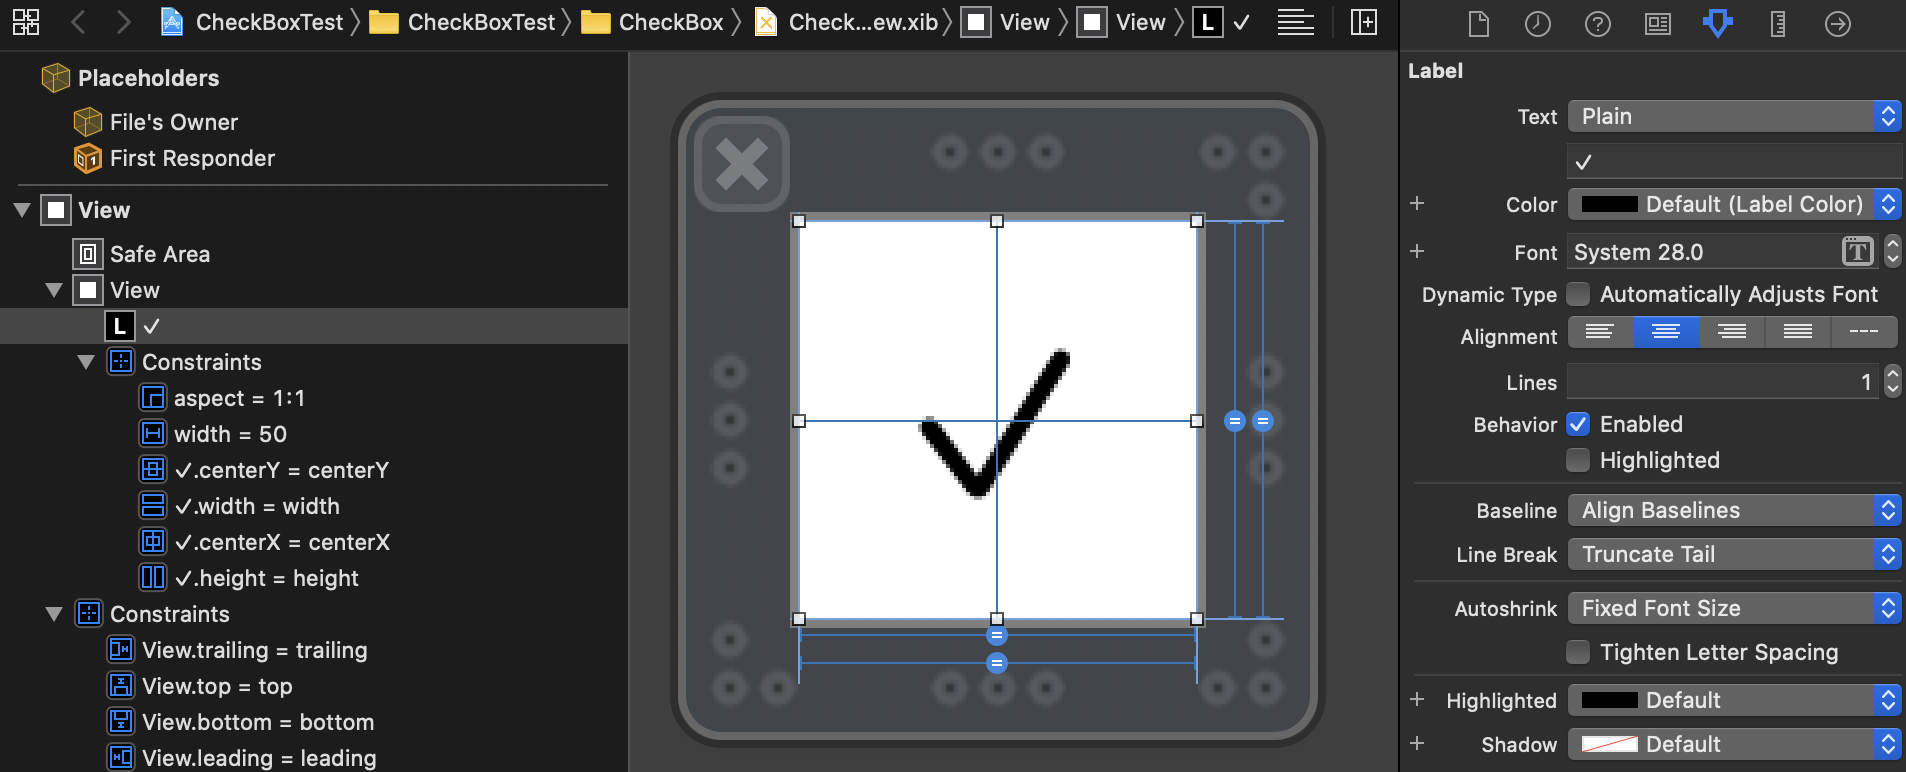
추가해줬던 UIView를 클릭하고 오른쪽 탭의 Identity Inspector로 이동하자.
Identity Inspector의 세번째에는 User Defined Runtime Attributes라는 것이 있다.
나는 View의 테두리 효과를 줄 때 여기를 작성한다.
체크박스에 필요한 효과는 테두리 굵기와 색상이므로 두 속성만 추가한다.
layer.borderWidth는 테두리의 굵기, layer.boardUIColor는 테두리의 색상에 대한 속성이다.
선택사항으로 모서리를 둥글게 하는 cornerRadius 속성이 있다.
아래와 같이 소스코드로 layer에 대한 속성을 변경할 수도 있다.
|
1
2
3
|
checkBoxView.layer.borderColor = UIColor.black.cgColor
checkBoxView.layer.borderWidth = 1.0
checkBoxView.layer.cornerRadius = 10
|
cs |
(예전에는 User Defined Runtime Attributes에도 소스코드와 같이 layer.boardColor라고 적었던 것 같은데 안먹어서
borderUIColor로 하니 됐다. 근데 소스상에서는 또 borderColor이다.)
3. Delegate 생성
deleagte라는 단어를 사전에 찾아보면 대표, 위임하다, 대표를 뽑다 라는 뜻이라고 나온다.
iOS에서는 대리자의 역할을 해주는 것으로 이해하면 된다.
Delegate.swift에는 delegate를 이용하여 어떤 기능을 사용할 것인지에 대한 청사진을 정의해둘 수 있다.
CheckBox에서는 CheckBox를 클릭했을 때 체크표시를 보여주는 것을 Delegate 함수로 사용할 것이므로
CheckBoxDelegate.swift에 아래와 같이 작성한다.
인자값으로 CheckBoxView를 가지는 checkBoxHighlight() 이다.
|
1
2
3
|
protocol CheckBoxDelegate: class {
func checkBoxHighlight(cb: CheckBoxView)
}
|
cs |
생성된 Delegate를 사용하려면 아래 3가지 과정을 거쳐야 한다.
1) delegate 변수 생성
2) delegate 함수 호출
3) delegate 함수 구현
4. CheckBoxView.swift 구현
이전에 만들었던 CustomView의 소스에 CheckBoxDelegate에 대한 부분을 추가하였다.
우선 delegate 변수를 추가하고 checkBoxView에 tapGesture를 추가하여 delegate 함수를 호출하도록 한다.
delegate 함수에 대한 구현은 여기서 하지 않으므로 delegate 변수 생성, delegate 함수 호출부분만 작성한다.
|
1
2
3
4
5
6
7
8
9
10
11
12
13
14
15
16
17
18
19
20
21
22
23
24
25
26
27
28
29
30
31
32
33
34
|
class CheckBoxView: UIView {
@IBOutlet var checkBoxView: UIView!
@IBOutlet weak var checkLabel: UILabel!
// Delegate 변수 추가
var delegate: CheckBoxDelegate?
override init(frame: CGRect) {
super.init(frame: frame)
commonInit()
}
required init?(coder aDecoder: NSCoder) {
super.init(coder: aDecoder)
commonInit()
}
private func commonInit() {
Bundle.main.loadNibNamed("CheckBoxView", owner: self, options: nil)
addSubview(checkBoxView)
checkBoxView.frame = self.bounds
checkBoxView.autoresizingMask = [.flexibleHeight, .flexibleWidth]
// checkBoxView 속성 변경
self.checkBoxView.isUserInteractionEnabled = true
// checkBoxView 제스쳐 추가
self.checkBoxView.addGestureRecognizer(UITapGestureRecognizer(target: self, action: #selector(self.checkBoxClicked(_:))))
}
@objc func checkBoxClicked(_ sender: Any) {
// CheckBoxDelegate 함수 호출
delegate?.checkBoxHighlight(cb: self)
}
}
|
cs |
4. Delegate 사용
delegate 함수를 호출하기 전에 어느 시점에 호출해야하는지 파악해보자.
앱을 실행하고 화면이 로드된다.
사용자가 CheckBox를 클릭하면 Delegate 함수가 호출되어 ✓ 표시가 되고 아래 문자열이 "Checked"로 바뀐다.
CheckBox를 클릭하면 delegte 함수가 호출되어야 하고
사용자가 CheckBox를 클릭하는 것을 최초에 인식하는 부분은 ViewController이므로
ViewController에 ChekBox를 배치한다
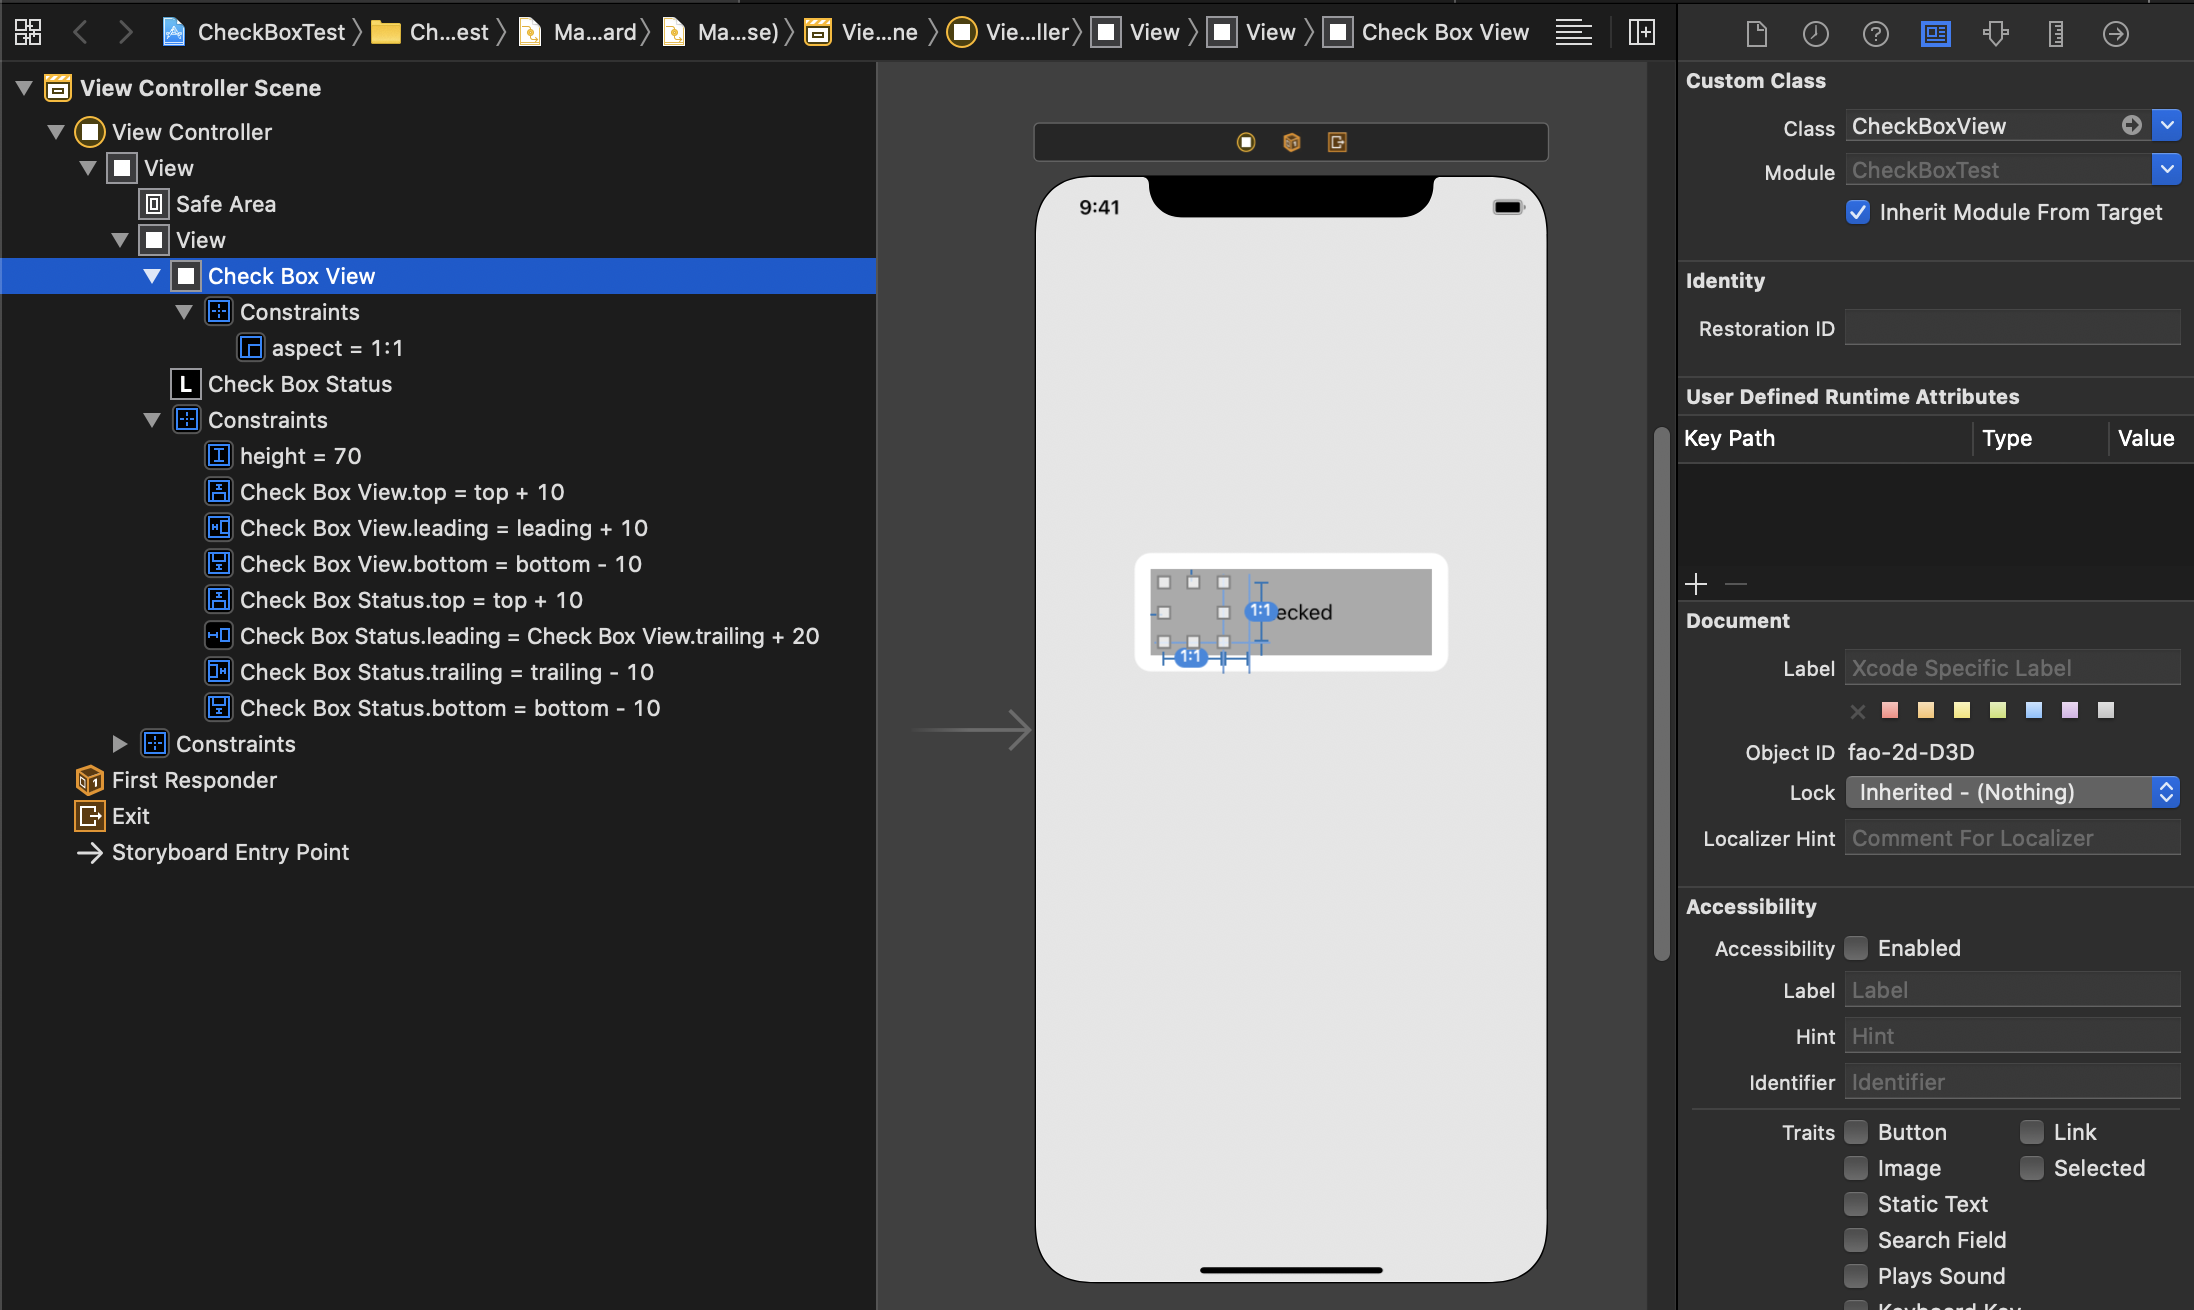
CheckBoxView에 대한 Delegate 함수를 구현한다.
|
1
2
3
4
5
6
7
8
9
10
11
12
13
14
15
16
17
18
19
20
21
22
23
24
|
class ViewController: UIViewController {
@IBOutlet weak var checkBoxView: CheckBoxView!
@IBOutlet weak var checkBoxStatus: UILabel!
override func viewDidLoad() {
super.viewDidLoad()
// checkBoxView의 delegate(대리자)는 self이다.
self.checkBoxView.delegate = self
}
}
extension ViewController: CheckBoxDelegate {
//Delegate 함수 구현
func checkBoxHighlight(cb: CheckBoxView) {
print("checkBox Clicked")
if cb.checkLabel.isHidden == false {
cb.checkLabel.isHidden = true
self.checkBoxStatus.text = "Not Checked"
} else {
cb.checkLabel.isHidden = false
self.checkBoxStatus.text = "Checked"
}
}
} |
cs |
viewDidLoad()에서 checkBoxView의 delegate를 self로 지정준다.
extension을 이용하여 CheckBoxDelegate를 상속받고 CheckBoxDelegate 함수 구현한다.
끝이다.
요약
1) ViewController에 추가된 CheckBoxView를 클릭
2) CheckBoxView에 추가된 GestureRecognizer에 의해 checkBoxClicked(_:)가 호출
3) checkBoxClicked(_:)에서 CheckBoxDelegate의 checkBoxHighlight(cb:)가 호출
4) checkBoxHighlight(cb:)는 CheckBoxDelegate를 상속받은 ViewController에 구현된 대로 작동
'이상 > iOS' 카테고리의 다른 글
| [iOS] UITableView Editing Mode (0) | 2020.07.13 |
|---|---|
| [iOS] 엔터프라이즈 배포 (0) | 2020.07.06 |
| [iOS] UIScrollView(Vertical) 만들기 (0) | 2020.06.18 |
| [iOS] CustomView 사용하기 (0) | 2020.06.16 |
| [iOS] CustomView 만들기 (0) | 2020.06.16 |


